Our bed has been causing me troubles. First of all it was built-in, then it was a king not a queen…
After a few months, we bought the correct size mattress, and then I had to dress this new beast. I bought and returned two bedspreads before Baby Girl told me I was being ridiculous and I settled for the third one. It was a great deal from TJ Maxx, but it didn’t have matching shams in the right size and felt a little flat. I do try to make a concerted effort not to be ridiculous, so I said it was good enough for now.
That didn’t mean I couldn’t keep looking. Let’s be honest our bed is kind of cool and kind of weird all at the same time with its steps, angles, and triangular built-in head board. A little softness could work wonders.
I thought maybe Pinterest would inspire me. (For those of you who don’t “Pin”, Pinterest is an online bulletin board where you can gather and share ideas, pictures, and links.) I could make shams and tone down those hard edges. I found some beautiful bedding from Anthropolgie. They have gorgeous things. I loved the texture and softness, but not the price tag. The Euro Sham was $58, and I’d need at least two, three would be better–not in my budget at the moment. Besides I’d bought a pair of king-size pillows; I just needed to dress them up.
Then I did a little searching and found Kojo Designs’ knotted bedding tutorial. Was this the answer?
Originally, I put in a lovely picture from their web site, with their name below, because I don’t want anyone to think I’m stealing credit for their amazing idea. Unfortunately, the blog powers that be have chosen that photo as the one representing this post. So for the past two hours I’ve been trying to change it. I give up. If you’d like to see a truly beautiful comforter click on the link above. I’ve deleted their photo, so it doesn’t look like I’m stealing their thunder. They have some great ideas, so go ahead and check out their blog.
I already had the bedspread, I needed to figure out how to work this into shams. The tutorial was so straight forward. I bought a set of double-size jersey sheets at Target and got busy. If only that were true. Actually, I stuck them in my closet and did nothing until I cleaned it out a few weeks back and decided I really ought to do something with those pillows and sheets. Sometimes I start off strong, get everything together, and then am paralyzed with doubts.
Well, in an effort to clean out my closet, make my bed look cozier, and mark another thing off my to-do list, I finally did get started a few weeks ago. I followed the tutorial’s really clear directions for making the squares, but she had sewn hers together and then backed them with a comforter and quilted the whole shebang. I wanted some stability without having to quilt it, so here’s how what I did.
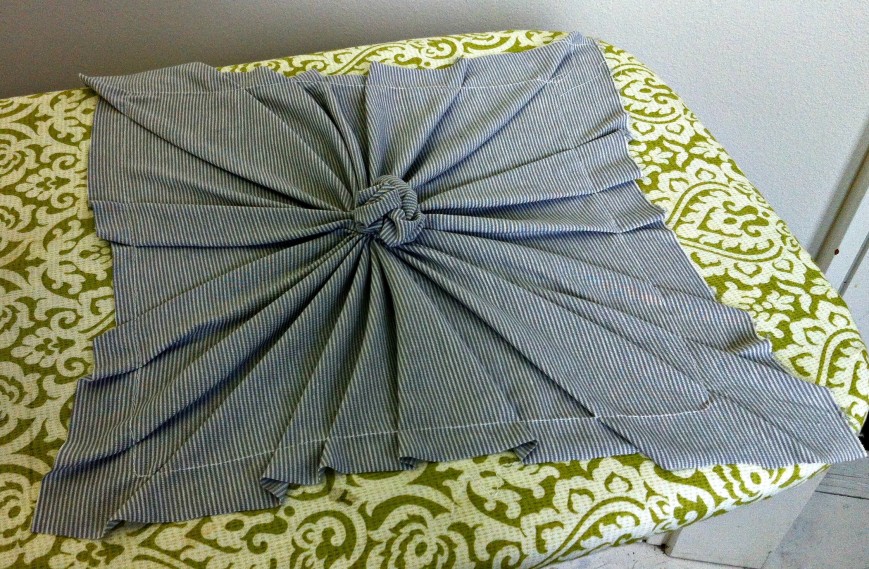
I made the motifs by drawing a 6″ circle in the middle of a 19″ square using a fabric marker. Then using heavy-weight thread, I sewed a running stitch (by hand) around the circle and pulled it tight. I ended up with a point in the middle of a funky square. Then I pushed the tip of the point back through the circle, tacked it down in the back, smooshed (that’s a technical term) the center all into shape and tacked it down till it looked just the way I wanted. Kojo Designs has great pictures and instructions.
Then I pinned some pleats into place so the motif looked more like a square with a blob in the middle, and I sewed around the edge.
Next I cut out a 12″ square of muslin and trimmed the motif to size.
Then, I put the motif on top of the muslin and sewed the pieces together. That gave me lovely squares that weren’t quite as flimsy as jersey alone. I sewed two together–not quite big enough. I decided I needed three across each sham. While that made them almost wide enough, they were too short… I’d add a border of plain fabric. I didn’t want the border to be too insubstantial in comparison to the center motifs. I was worried they wouldn’t lay nicely and look like they belong together. So I decided to make a border of gathered strips.
I simply snipped the top sheet across the width at 5″ intervals until I had four strips of fabric. They looked a little wonky. Nothing a little ironing wouldn’t change.
I measured my three motifs sewn together and cut a piece of muslin to size. Then I sewed double rows of basting along the long edges of the fabric strips, and started gathering. This was a long and tedious process; but when I sewed them to my motifs, I was extremely pleased with the way they turned out.
These were looking good, but unfortunately they were still not quite the right size. I need to add a little width, so I want back to strips and gathering. If I used the same width of strips, the pillows would be too wide, so I decided to go with three inch strips with double the length gathered to them. I’d heard about zigzagging over heavy cord or dental floss to gather fabric but never tried it. After the hours of gathering I’d done for the long sides, I thought it was worth a go.
I was amazed at how quickly I could gather these strips with the zigzag method. It gets the total thumbs up from me. I simple pinned the strip to be gathered to the muslin at beginning, quarter, half, three-fourths, and ending points and pulled the thick thread. It worked great.
I added these strips to the ends, Used two plain, overlapping sections in the back. Sewed them together and called it good. I bet you can’t wait to see what they look like.
Here’s a little more up close and personal.
We’ll take a step back without my West Elm pillow that I love.
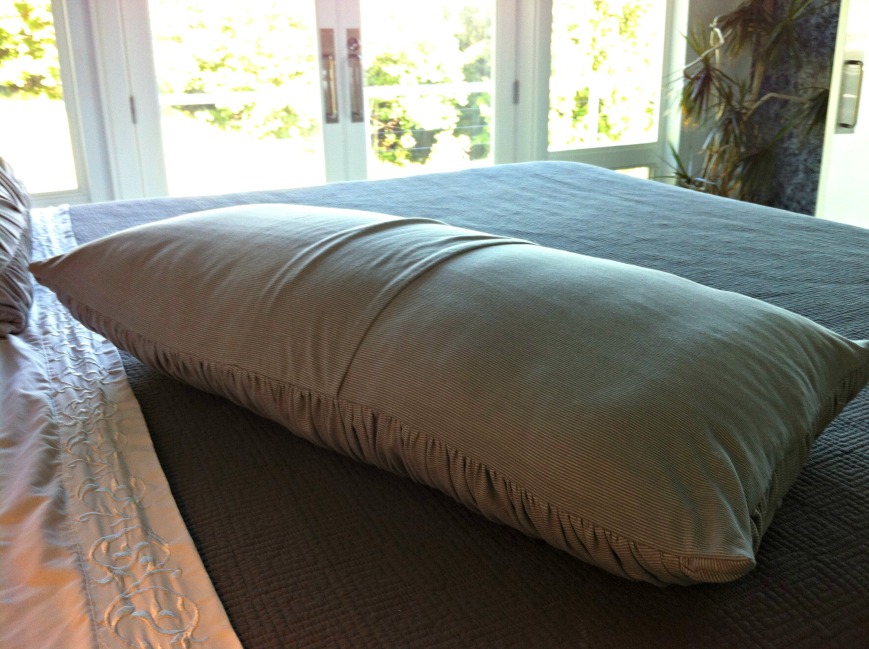
I may have to find another place for that pillow. Here’s a look at the backside. I can easily remove the shams and throw them in the wash, as needed.
Here’s another look, just because I really like them in silhouette.
It’s always satisfying when a project turns out well. I’ve had plenty that were just OK or horribly wrong, so I get a little spazzy when things go well. All my family had to come and admire them for me. I may also have invited my girls’ friends to check out my worm bin. I don’t mind marching to my own drum sometimes.
Along with really pretty, my new shams were a screaming deal. I bought the jersey sheets at Target for $25 and only used the top sheet and one of the pillow cases, so Baby Girl scored a new bottom sheet and pillowcase for her bed.
Some lessons learned were that when you’re gathering strips, the zigzag method is much faster than the double basting method, and that gathering strips will shrink a little in both width and length, so adjust.
I think these motifs would look great in a beautiful silk with some bead embellishments on the pleating near the center. That might be a little to foufie for me, but it would be gorgeous.
How about you, do you have projects waiting for you in the closet? Go ahead. I know they’ll turn out great.
I just added this to Young House Love’s Pinterest Party Challenge. They have lots of great ideas if you’d like to check it out here. Enjoy your Tuesday


You are incredible! These are fantastic and look so good. I am so not a sew (er) – I’m not really sure how you should spell that and sewer did not cut it. One of my goals this summer was to simply accomplish something. I have been doing some pinterest projects and photographing my progress. I intend to blog about my successful and failed projects. I am coming down to the end of my summer break, and will have to get busy on the blogging!
Thank you. I know i’m totally biased, but I do really like them. Sometimes the hardest thing for me is just getting started. It’ll be fun to see what you’ve been up to. I’ve missed your comments lately. Have you been on vacation?
The shams look great. I may have to come over for a lesson on how to do that. Maybe I will bring some silk and my beads… You are so creative and inspiring. If I could just get up the courage to get started.
Come over any time my friend. It’ll be a party 🙂
Oh yes, I can attest to these fantastically beautiful shams, as I have witnessed the whole procedure! my husband, Papa and I, MeeMee, aka Theodosius, have been staying here since mid-June, and today the Mrs. suggested we do an ‘art’ project with…………yup, you guessed it, pillows! Remember those southwestern pillows that were in front of the fireplace, when they first bought this big white house on the hill? Well, this is what Mrs. had us do today! Titled: When you have 1001 things to do, stop, and create some more beauty around you.
Remember the old footstool that was left at this house? Well, there were more, so she cut them in “pillow size” and then she, I and Baby Girl went out on the deck and painted these pillow size squares any way we wanted, with fabric paint. They all turned out so beautiful, and unique, and extremely different than the other’s.
What made them so fun was when you applied the water base paint, it would bleed to the surrounding areas, much like water colors. So you could water wash it all, and then use the paint straight and brush over it and, well…………I think Mrs. will elaborate more in another blog. I was just excited to have been a part of this extremely fun art project, and to have it turn out better that any of us expected.
Thanks MK. It was a fun and creative afternoon. I’ll have to share pictures another time.
We were on vacation. We went with friends to the Black Hills and all touristy places within a 100 miles (I’m not exagerating I don’t think, either) for 5 1/2 days and then we went on to the Minnesota border where my parents now live for a few days. Getting back in the swing of things isn’t easy.
Sounds like fun. Baby Girl’s last day of school was June 22, so we’re still enjoying the novelty of laid back summer days. September will roll around soon enough, and we have Sweet Miss headed off to college this year.
When in September do you start school? We get out around May 25 and are not returning August 13 (wayyyyyy, to early). I was processing a transcript from 20 years ago the other day and school started a whole 10 days later then, but got out around the same time. ugggg
We start 9/4 in the fall and are supposed to get out 6/19, but we always have a day or two off for flooding, snow, ice or power outages. Summer weather didn’t start till last week, so I guess it works out. But sometimes I just long for summer.
Sent from iPhone
Pingback: July Recap « bigwhitehouseonthehill
Pingback: May Recap | bigwhitehouseonthehill
Pingback: Inspired Recycling | bigwhitehouseonthehill
Pingback: That Trickle Down Effect | big white house on the hill
Pingback: A Little Contrast Please | big white house on the hill
Pingback: A Bargain Isn’t Always a Bargain | big white house on the hill